UPDATE: I now live with my brother in Stamford, CT while my family renovates a NYC townhouse/brownstone and right now I’ll be using Frontier FiberOptic until the new home is ready. Frontier here uses a Nokia ONT and since it’s an ex-AT&T area standard GPON uses 802.1X. I’m currently “bypassed” to my MikroTik box, the older AT&T Fiber bypass method works here also.
Also, Lumen/CenturyLink/Quantum Fiber now uses Smart NIDs (basically an ONT plus a wired router) instead of Calix ONTs. I never had a chance to have one as I cancelled CenturyLink before I could get one. I’ll keep this guide online indefinitely for reference purposes.
WARNING: This guide is for instructional purposes only. I am not responsible for any damages caused by this guide. This guide may violate your ISP’s terms of service and is possibly illegal. Proceed at your own risk.
When I got CenturyLink Fiber at my current residence, I initially had an issue which looked like “latency spikes and packet loss”.
Little did I know that the ONT (Optical Netowrk Terminal) given, a Calix 716GE-I R2 has a hard cap of 16384 TCP sessions, not unlike AT&T Fiber’s forced routers. Even lesser known that unlike AT&T’s infamous “BGW320” model, it’s very easy to clone Calix ONTs with just a JTAG cable, and other Calix models don’t have the issue. I cloned my ONT to a Calix 803G which has been literally perfect without issue since I took the plunge.
However, this guide isn’t for you if:
-
You have CenturyLink DSL
-
You have CenturyLink Fiber with another ONT vendor (e.g. Adtran)
-
You have AT&T Fiber with a BGW320 and want to “bypass”
-
You are replacing a Calix XGS-PON, NG-PON2, EPON or 10G-EPON ONT with a GPON ONT, or vice-versa
-
Your original ONT is non-Calix model
This guide may work with non-CenturyLink ISPs using Calix gear, however.
So you want to clone your ONT?
Pre-requisites
You need the following devices information:
-
Original, ISP-provided Calix ONT with the ONU MAC and FSAN Serial ready
-
If required, your GPON Password. CenturyLink doesn’t use this
-
Calix ONT being cloned to
-
JTAG serial adapter
About the JTAG adapter, the CP2102 models are recommended. Other models have had issues with Calix’s JTAG console.
Cloning the ONT
Now for the fun part.
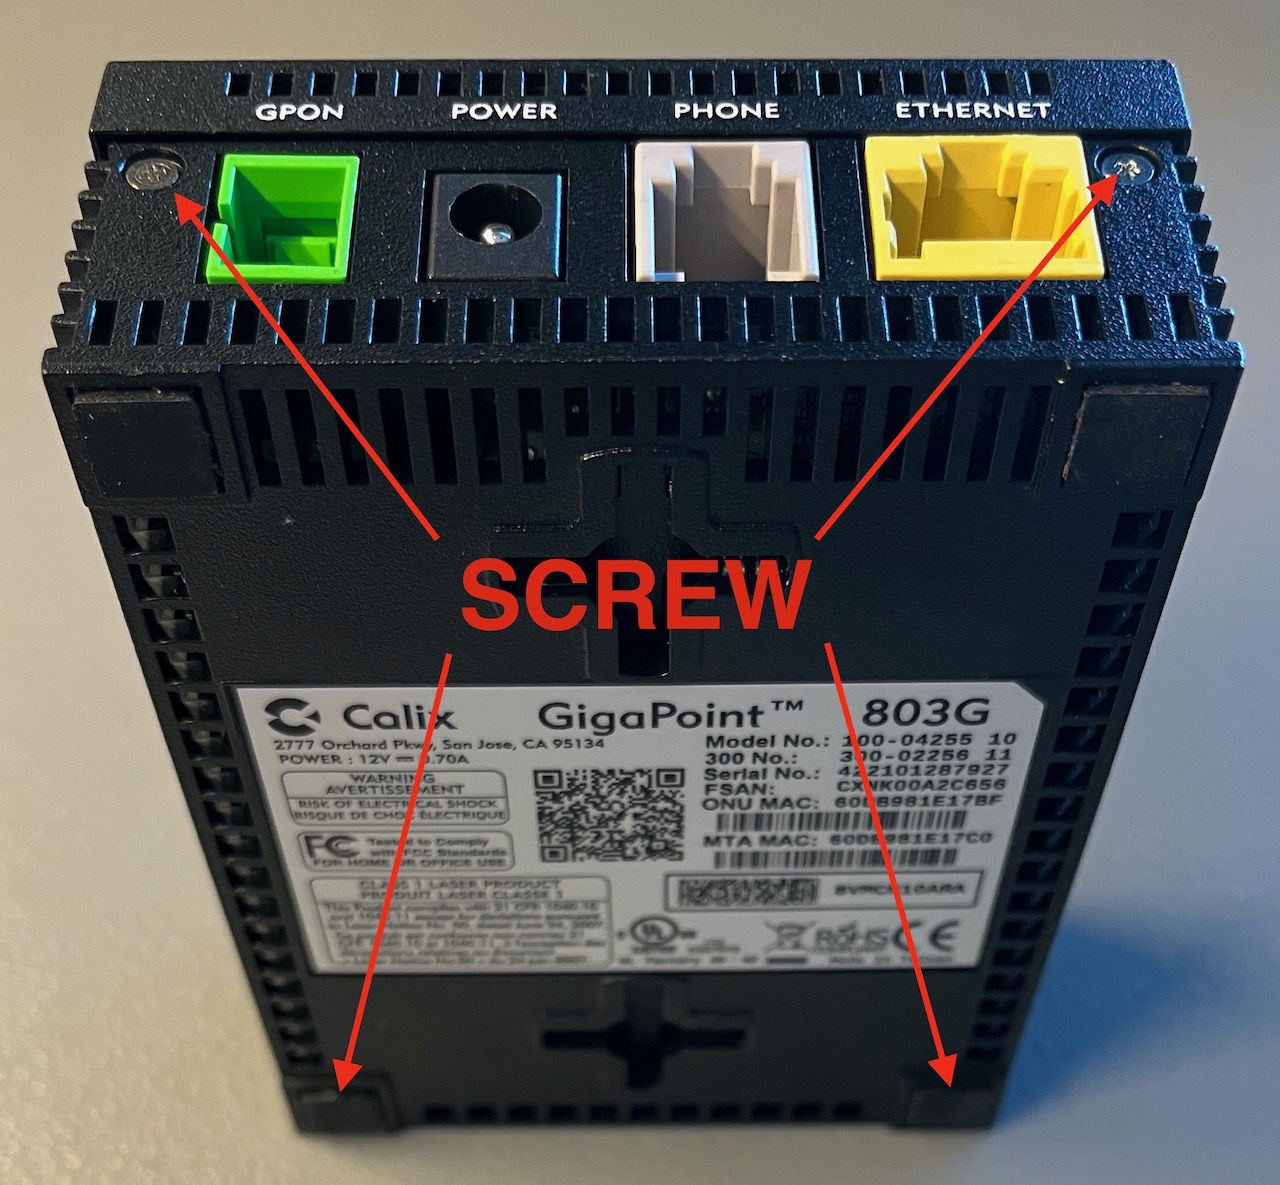
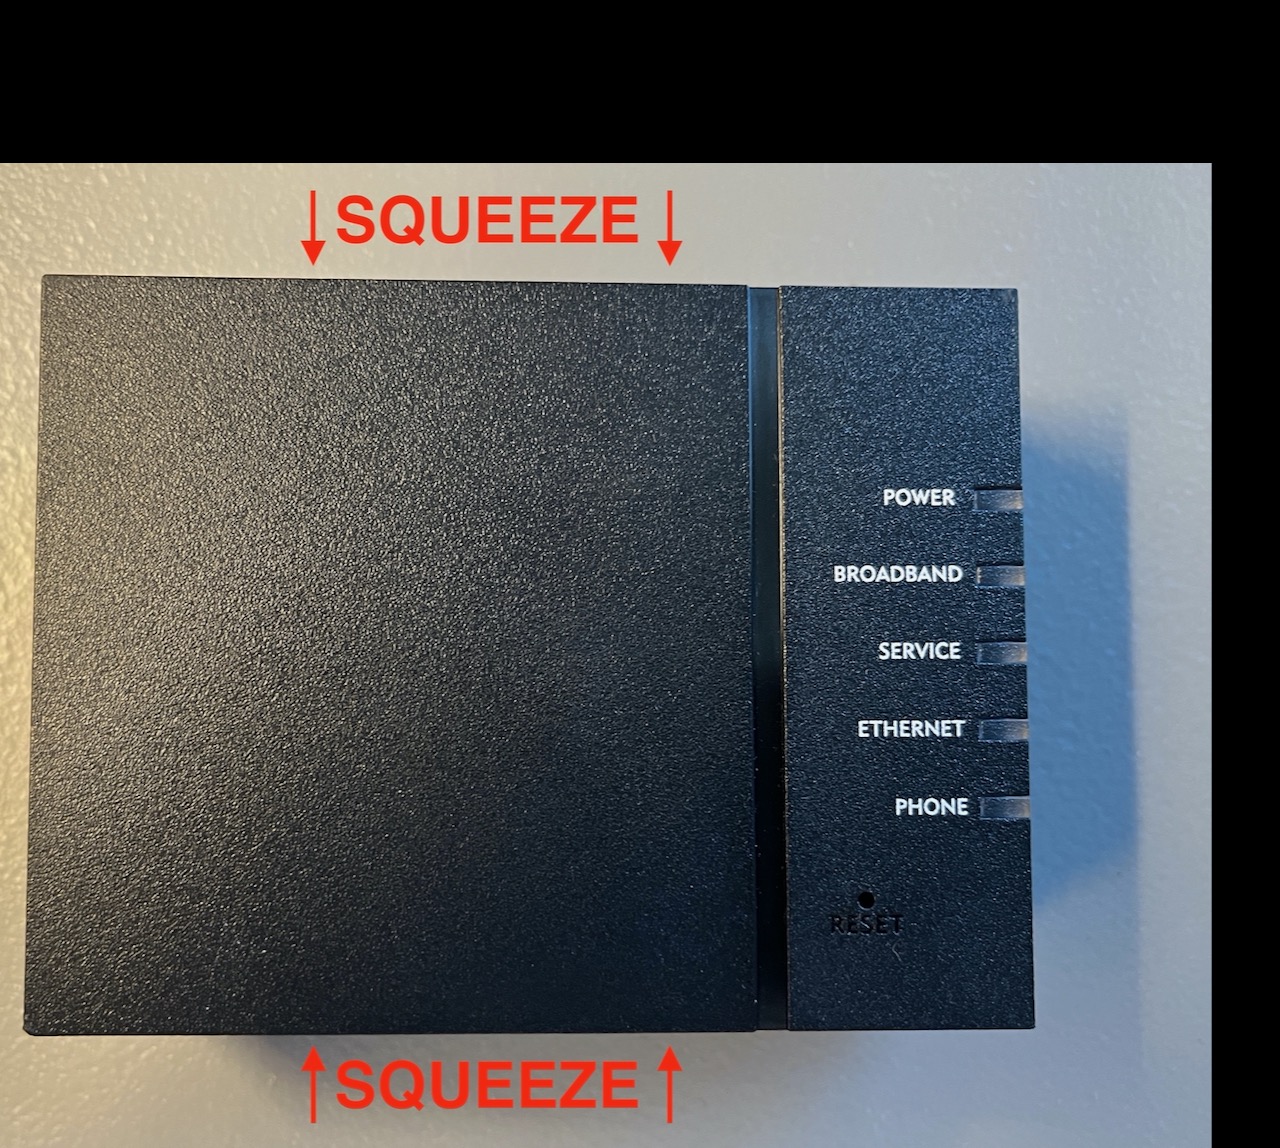
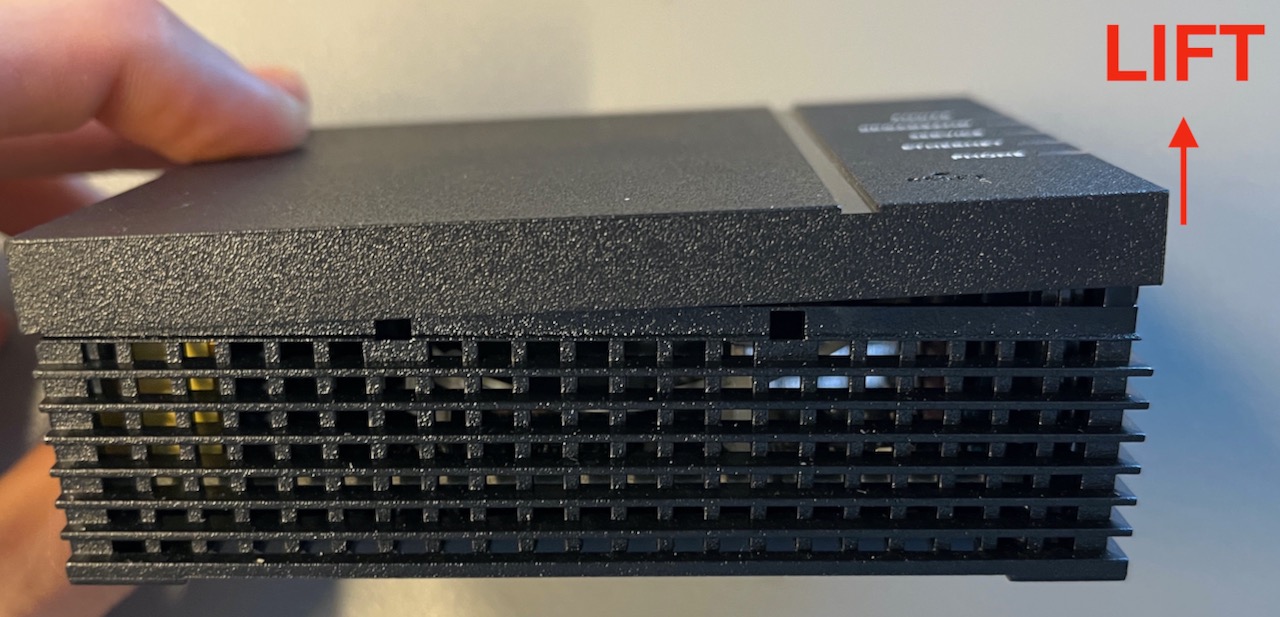
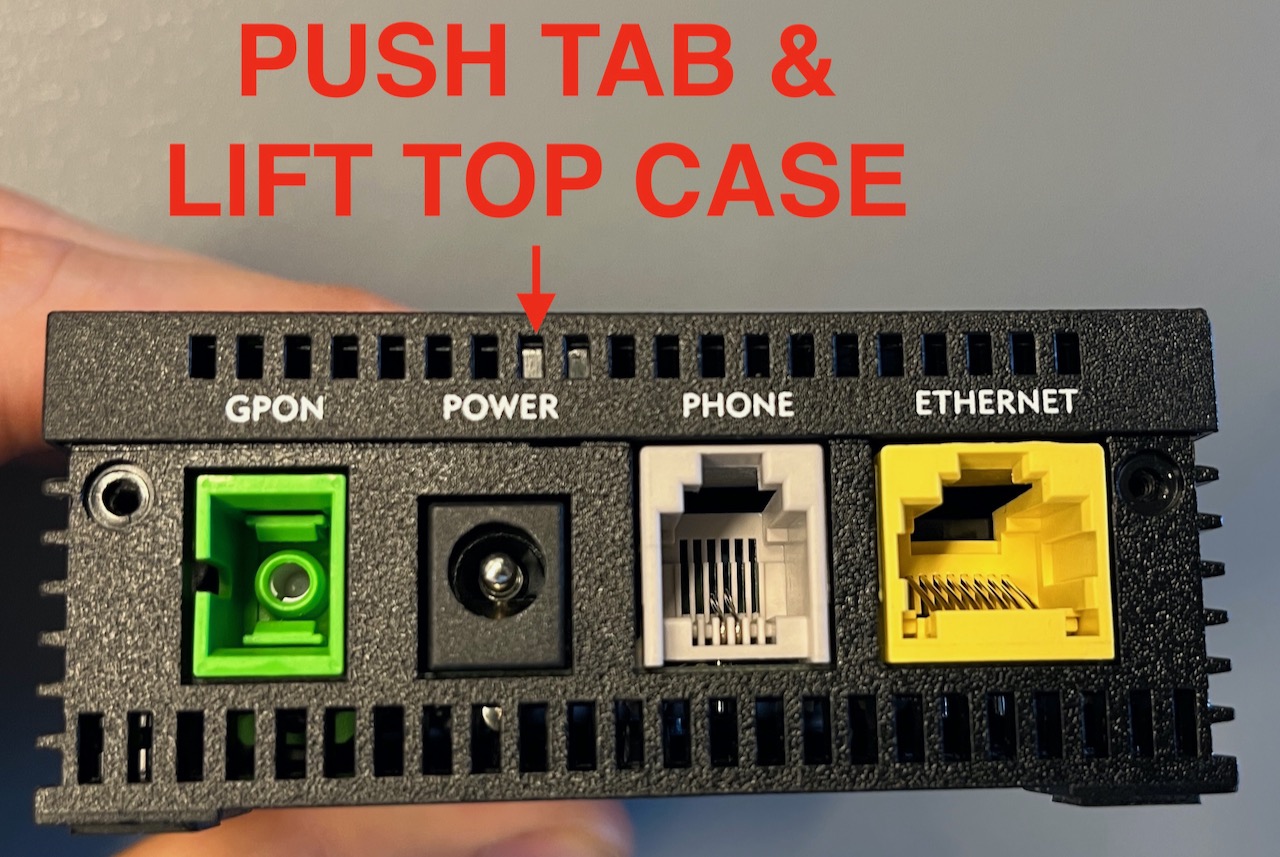
First off, you need to open your ONT.
For the 803G (the destination ONT), these images should be self-explanatory.
When you are inside, connect the JTAG.
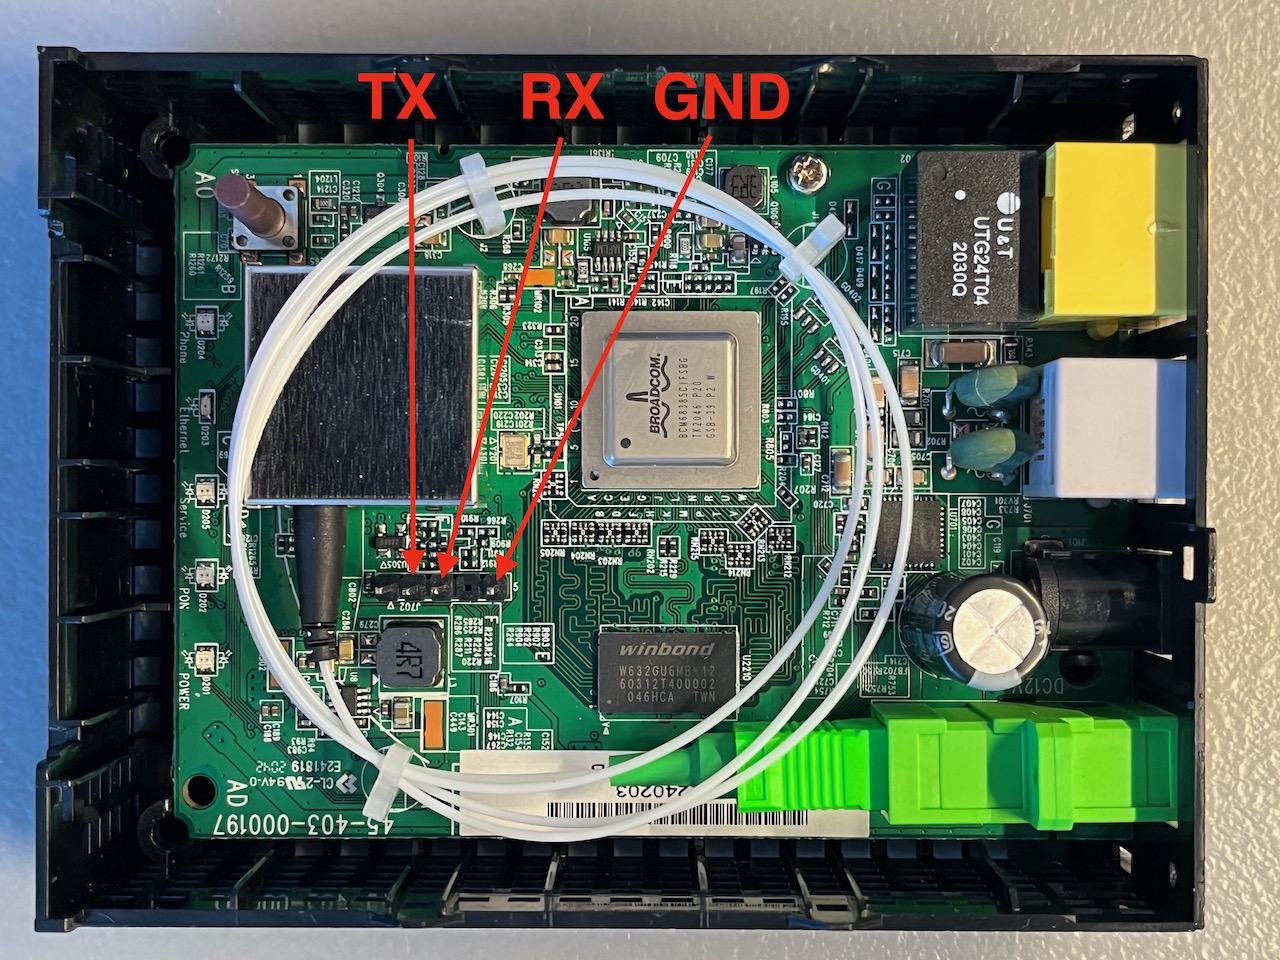
Note: The TX should go to your JTAG RX and vice-versa.
Image source: fire-foo.com.
When you connected your JTAG header pins, open a serial console (e.g. cu or
PuTTY), plug in the power while hitting ESC on your keyboard repeatedly.
When you are on the CFE> prompt, type b and press enter.
Press enter for most of the values, except the Base MAC Address and GPON Serial Number which should be the ONU MAC and FSAN Serial respectively from your source ONT.
Some ISPs may need a GPON password, but it seems CenturyLink does not. I do now know how to get the GPON password as I was never in that scenario.
Once you are done, wait for the ONT to boot succesfully, then turn off the power, close the ONT, and plug the fiber and power in place of your stock Calix ONT.
An example of a JTAG session can be seen here.
Notes for Apartment Dwellers using CenturyLink
If you live in an apartment or condo complex where the ONTs are in the telecom room, you may not have an avenue to clone.
CenturyLink usually does fiber to the wiring closet and Cat5/6 to each unit in apartments, unlike most fiber ISPs which do fiber to the unit.
I don’t know if the 16384-connection limit affects MDUs, but if it does, you can either use a UDP or GRE-style VPN, or another ISP. In some cases, you may have a competitor such as Google Fiber (or Webpass), Astound Broadband (former Wave G), or Starry Internet, In other cases the other competitor is a cable ISP like Comcast or Spectrum with high costs and slow uploads.
If you don’t know about other ISPs other than CenturyLink or Cable, look at Yelp or Google to see if they are available. Maybe request them in your building if not. I cannot guarantee entry for them, but fortunately the FCC in the US banned wiring exclusivity arrangements so there’s a chance of entry.
You could also ask CenturyLink support (assuming you have them) to disable Broadcom Packet Flow Cache, but I don’t know if this is possible.
Other ISPs using Calix gear likely have fiber to each individual unit, so this guide may still apply to them.